Adding 2D Lighting to Your Game
I recently had a talk at the Game Developer Conference in San Francisco on the topic of Advanced Visual Effects in 2D Games. A big part of the talk was about normal maps and 2D lighting (the slides from the talk are available here). In this blog post I want to share some of the highlights from the talk.
Personally, I am very excited about the way 2D games seem to be going, and more specifically the advances we have made in SpriteBuilder when it comes to effects and lighting. Adding better visual effects to your game can make such a huge difference in how the game is perceived, even with the same graphics and gameplay. As a demo for SpriteBuilder we created the Galactic Guardian game a couple of months ago. It was a decent looking game and it was fun to play, but after we took an extra week to just add in more effects, the difference is like night and day! Click the screenshots to see videos of the game before and after we added the effects.

Without effects

With effects
The only real difference between the examples is the added 2D lighting and better looking explosions. I'll save the explosions for a later blog post and focus on the lighting in this one.
What is 2D lighting?
There are basically three things needed to do 2D lighting on a sprite in a game. We need a custom shader, a normal map for the sprite, and a light source. Put these together and you get an effect that is still 2D but definitely has a bit of a 3D feel to it. In a game, this can look truly amazing.

Shaders
The first thing needed to get 2D lighting going is a custom shader. Shaders are small programs that are compiled onto the graphics card. They are used to calculate the final color of your sprites' pixels. Shaders can be pretty complex to write, even for advanced developers, but luckily if you use a tool such as SpriteBuilder there will be a library of shaders and effects already written for you.
Normal maps
Secondly, we need normal maps for the sprites we want to light. So, what are these normal maps? If we ask Wikipedia, they have the answer:
"A normal map is an image where the RGB components correspond to the X, Y, and Z coordinates, respectively, of the surface normal."
What does that even mean? It's not as complicated as it sounds. In a normal map each pixel, instead of representing a color, represents the direction the pixel is tilted. A direction, also called a vector, can be represented by three components X, Y, and Z. In a computer image, the pixel colors are represented by three values; the red, green, and blue value. When we create a nomad map we use the red, green, and blue channels to represent a direction instead of a color.
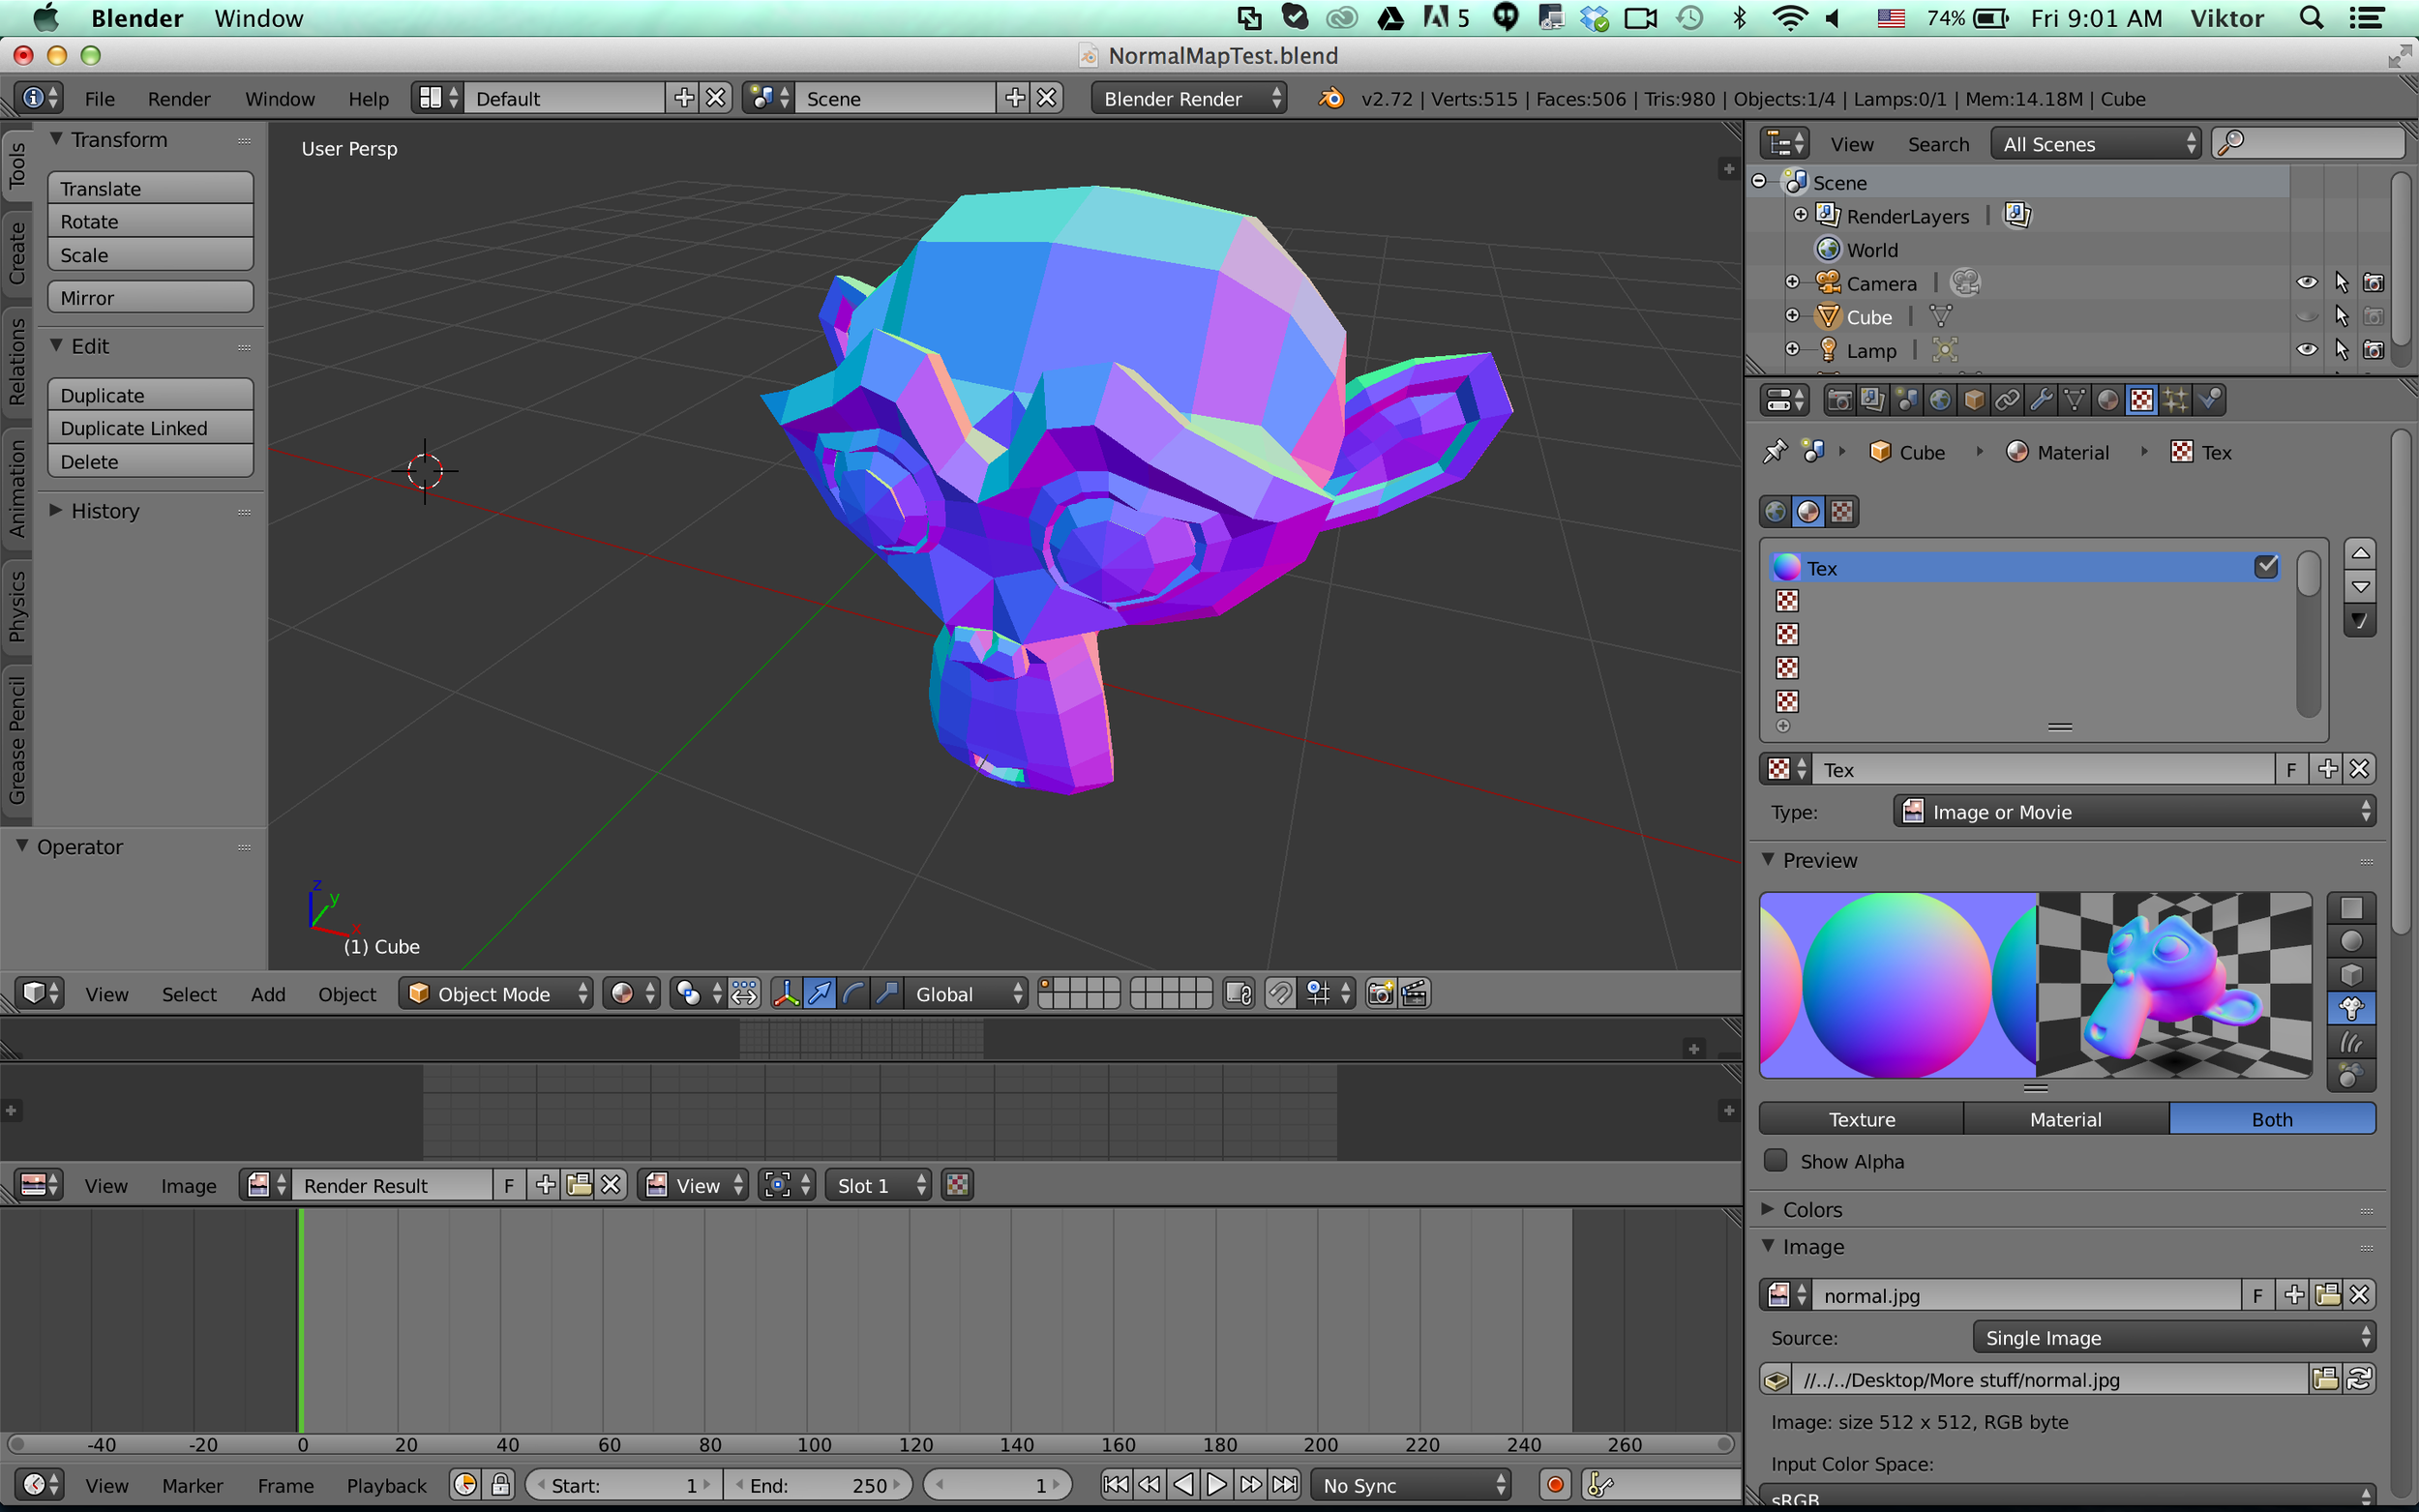
In the following image we see the normal map of a sphere as viewed from above. Pixels at the top of the image are tilted more upwards and therefore more green, pixels at the right side are tilting right and therefore more red. Pixels facing the viewer appear more blue.

The real problem with normal maps is finding a good way to create them. There are five different methods of creating normal maps:
- Draw them manually in a drawing program
- Generate them in a 3D application
- Build them from height maps
- Use custom normal map editors
- Combine any of the approaches above and merge the results
The different methods have their own pros and cons, so you may want to use different methods for different types of sprites.
Drawing normal maps manually
Drawing normal maps manually is the most painful way to make normal maps. However, there are cases where it can be a good approach. If your images have sharp edges and large flat areas, this may be the way to go. Use the normal sphere to pick colors, but be careful to not use any form of gradients or antialiasing as that can create unexpected artifacts.

Manually drawing a normal map in PhotoShop
Normal maps from 3D applications
Generating the normal maps with a 3D application works great. However, the obvious problem is that you need 3D models of your sprites, which may not be what you want if you are doing a 2D game. If you use Blender you can assign a normal map material to your objects to correctly render them out.
Rendering a normal map in Blender
Generating from height maps
For details, generating normal maps from height maps can be a good option. A height map is a grayscale image where lighter pixels appear closer to the camera and darker pixels appear farther away. With a program such as CrazyBump these can be converted to normal maps.

Generate a normal map from a height map with CrazyBump
Normal map editors
There are a bunch of tools becoming available for creating normal maps. Most notably SpriteIlluminator, Sprite DLight, and Sprite Lamp. These tools really take the pain out of generating the normal maps, and are the prime choice for most types of sprites.

Creating a normal map with SpriteIlluminator
Merging normal maps
Unlike normal images, normal maps cannot be merged by simply adding them together in a drawing program. Instead, we need a custom type of tool such as NormalMixer to do this. Using a normal map mixer can be useful if you want combine the methods mentioned above to create your final normal map.
Putting things together into a scene
Now that we have figured out the normal map situation, how do we actually add 2D lighting to our games? If you are using SpriteBuilder, this is really very easy. In other tools it may be slightly more complicated, and for some engines you will even need to write your own shader code to get things up and running. If you are a SpriteBuilder beginner, I strongly recommend visiting our *Learn* page, there are lots of easy to follow tutorials there!
Add a sprite to the screen by dragging and dropping it. When the sprite is selected, you can assign a normal map to it in the properties panel.
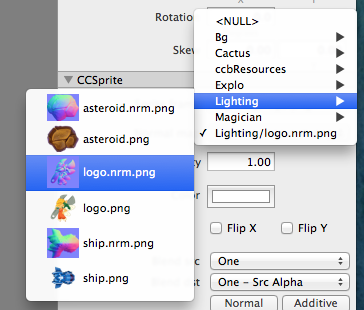
Setting a normal map in SpriteBuilder
The next step is to add a lighting effect to the sprite. Adding the effect will automatically generate a custom shader and associate it with the sprite.

Adding a lighting effect
You are almost set, the final thing you want to do is to add some lights to your scene. Do this by simply dragging a light node to the stage.

Drag a light to the stage
Tweaking and tinkering
What's really cool with SpriteBuilder is how it allows you to visually edit the lights and even animate them on the timeline. The easier it is to experiment with the effects you add to your game, the better your final results will be.
Each light that you add to a scene has a set of properties. The most notable ones are diffuse color, specular color, and ambient color. You can also adjust the intensity of these. The picture below illustrates how these properties work. Ambient lighting is the base level of your light and the specular color applies a shininess or gloss.
In SpriteBuilder you can also adjust the size of the light cone, the z distance, and how sharply the edges of the lights are cut off. Remember, experimentation is your friend, play around and you can create amazing things!